Creating text indents in Canva is not as straightforward as in traditional word processors like Microsoft Word or Google Docs.
However, with a few manual adjustments, you can achieve the desired text layout. This guide will help you understand how to create different types of indent, including hanging indents in Canva and Canva Docs.
First things first. If you don’t have a Canva Pro subscription yet, start with a free trial.
Related: Access Canva Pro for free
Table of Contents
ToggleUnderstanding Indentation Types
Before we dive into the “how-to,” let’s clarify what we mean by indents. There are several types:
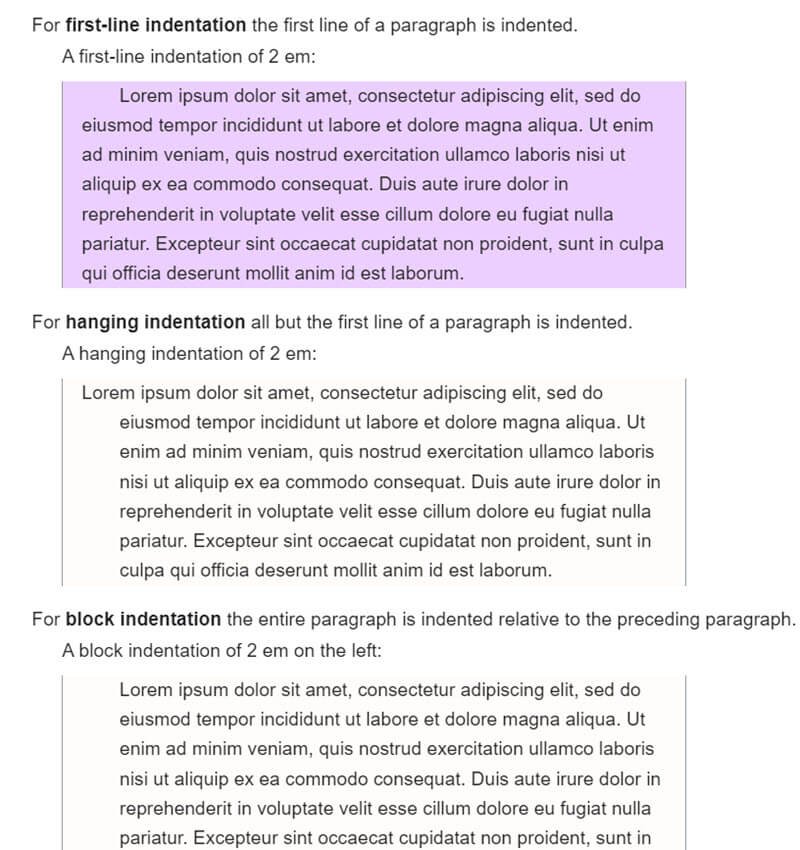
- First-line indent: Only the first line of a paragraph is indented.
- Hanging indent: The first line starts to the left, with the rest of the paragraph indented to the right.
- Block indent: The entire paragraph is indented from the left margin.
How to Indent in Canva
To indent text in Canva, you need to manually adjust your text boxes or use spaces. For a simple first-line indent, type spaces before the first line. For a block indent, move the entire text box to the right. In Canva Docs, you can use the Increase or Decrease Indent options only to create first-line or block indents.
How to Do a Hanging Indent in Canva
There is no hanging indent feature in Canva, so you have to do it manually. Cut the first line from your text box and paste it onto your design. Format it like the original text and position this line to the left of the original text to achieve the hanging indent effect.
Watch my video for a complete guide on how to add indent in Canva and Canva Docs.
Pro Tip:
Canva Docs offers indenting features, but they are not available in other Canva designs. So how you indent in Canva and Canva Docs might be slightly different.
Indenting in Canva Designs (not Docs)
Canva designs include a range of projects like Instagram stories, presentations, or any other graphic design work. Unfortunately, Canva doesn’t offer a one-click indent feature for designs, so here’s how to manually create indents:
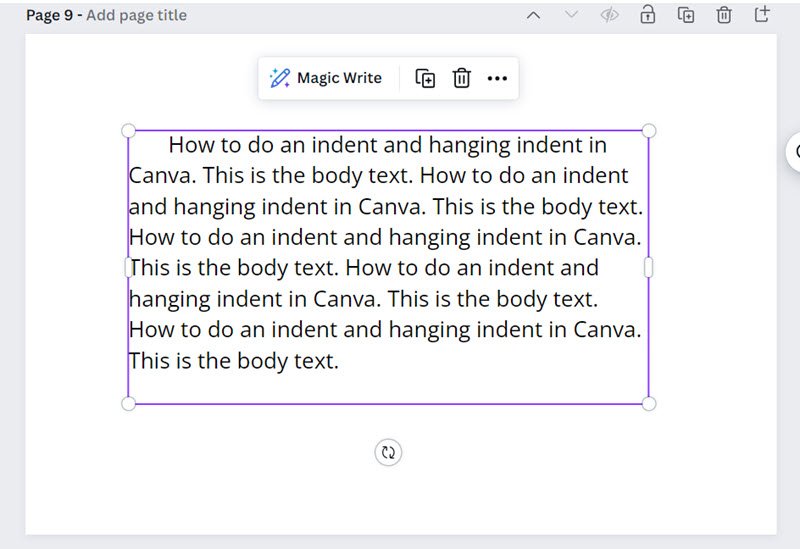
1. First-line Indent
Simply add spaces before the text of the first line until it reaches the position you want.
2. Block Indents
Since there’s no tab or ruler like in Word, you’ll have to adjust the text box manually to create these indents. Move the entire text box to the left or right, or frankly, wherever else you want it.
3. Hanging Indent
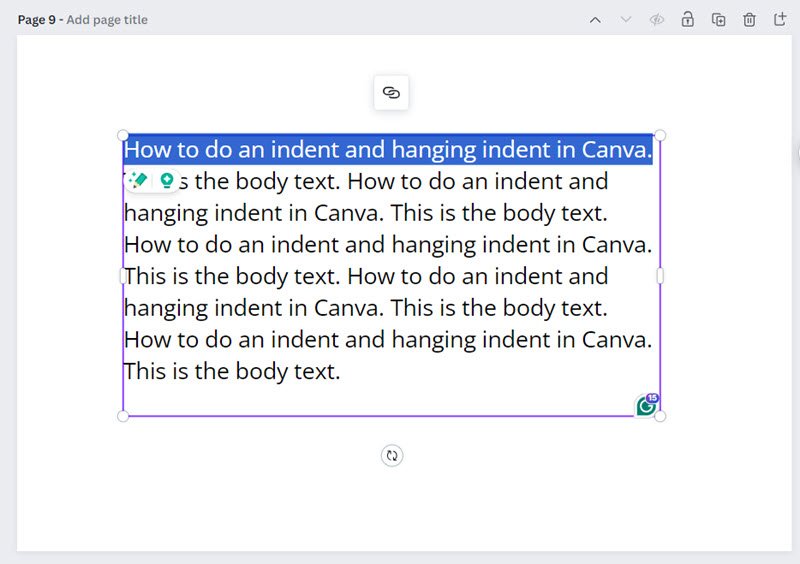
1. Select the first line of your text box and cut it out.
2. Paste this line in your design
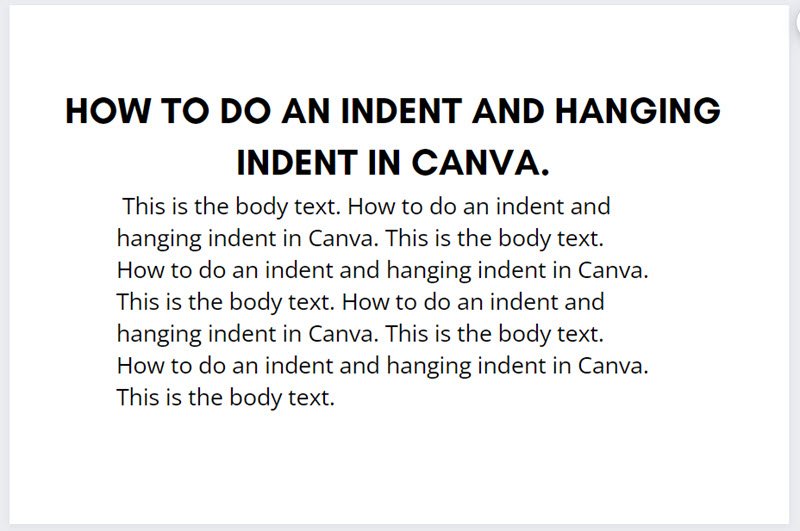
3. Apply the same formatting to this line of text as the original text box
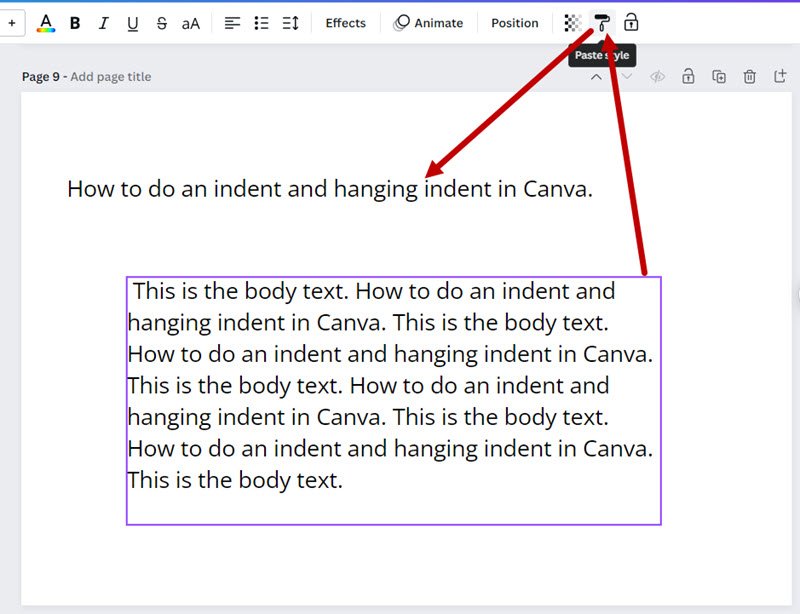
4. Position this line of text to the left of the initial text box

And that’s how you add a hanging indent in Canva!

30-Day Free Access
Try out all Canva PRO features
- 1-Click Background Remover
- Create Designs in Bulk
- 1-Click Design Resize
- 100M+ Stock Content
- 600K+ Templates
- Transparent background PNG files

30-Day Free Access
Try out all Canva Pro features
- 1-Click Background Remover
- Create Designs in Bulk
- 1-Click Design Resize
- 100M+ Stock Content
- 600K+ Templates
- Transparent background PNG files
How to Indent Text in Canva Docs
Indenting in Canva Docs is a little bit more straightforward, thanks to indentation options. But honestly, only a little bit.
To indent text in Canva Docs, highlight the paragraph or first line of text and use the “Increase Indent” button. To reduce the intent, click “Decrease Indent”.
Here are the steps to apply indents in Canva Docs using the indent features:
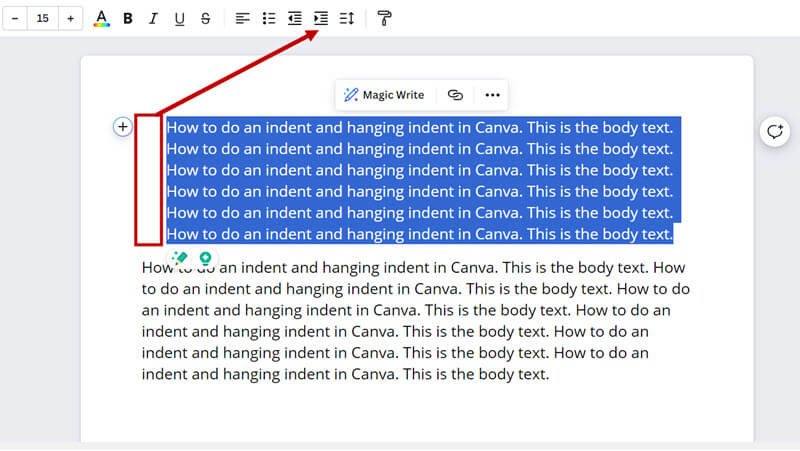
1. Indent an entire paragraph.
Select the paragraph or block of text you want to indent.
Click on the “Increase Indent” icon in the toolbar to shift the text right. Use “Decrease Indent” to move it left.
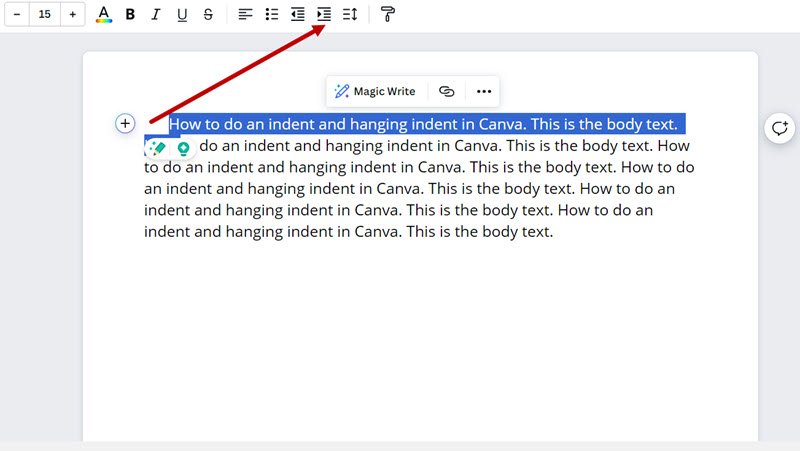
2. Indent the first line
Select the first line of your paragraph and click on “Increase Indent”. This will move the text to a small increment (about 2 em spaces).
If you need to reduce the indent, you can click the “Decrease Indent” button to move the text back towards the left margin.
Indent Limitations and Workarounds
1. Indenting the first line multiple times may move the entire block.
Canva Docs does not allow for absolute control over the size of the indent, as you might find in Microsoft Word with its ruler and tab stops.
You can only indent the first line once in Canva Docs.
If you keep the first line selected and click on “Increase Indent” a 2nd time, it will move the whole block of text to the right or left. (See my video above to see how this works).
2. You cannot create a hanging indent with the “Increase Indent” option.
It will not move the first line to the left of the paragraph, only to the right. As in other Canva designs, you have to do this manually as shown above.
3. You can also adjust the first-line indent completely manually, just like with any other Canva design.
You can also ignore the Indent icons and completely adjust your text manually. Place the cursor at the beginning of the first line. Manually add spaces to create an indent.

30-Day Free Access
Try out all Canva PRO features
- 1-Click Background Remover
- Create Designs in Bulk
- 1-Click Design Resize
- 100M+ Stock Content
- 600K+ Templates
- Transparent background PNG files

30-Day Free Access
Try out all Canva Pro features
- 1-Click Background Remover
- Create Designs in Bulk
- 1-Click Design Resize
- 100M+ Stock Content
- 600K+ Templates
- Transparent background PNG files
Conclusion
Canva offers basic tools to achieve different types of text indents, although most of the time, you’ll need to adjust the text to get it just right manually.
Remember that Canva is not meant to replace traditional word processors for heavy text manipulation. Canva is also not Illustrator.
The biggest advantage of Canva is that its a reasonably priced tool with which you can easily and quickly create designs that combine text with visual design elements. You can also create a lot of text customization, like highlighting text, creating wavy text, and more.
Other Canva tutorials you may like:
Pages & Elements
- How to change page orientation in Canva
- How to change to landscape in Canva
- How to flip elements in Canva
- How to rotate in Canva
- How to select all in Canva
Fonts & Text
Visual Effects
- How to add a gradient in Canva
- How to add drop shadow in Canva
- How to invert colors in Canva
- How to slice in Canva
- How to pixelate a photo
- How to change the color of an image in Canva
- How to mask in Canva
- How to curve an image
- How to select all in Canva
- How to Add an Outline to an Image in Canva: 3 Ways
- How to Cut Out an Image in Canva: 3 Ways
- How to Mask in Canva: Create a Clipping Mask Effect
Print & Business


