How to Add an Outline to an Image in Canva: 3 Ways
You can outline fixed-shape images in Canva using a basic image border or the Can Border app. For adding borders to cutout images, use the background remover tool to remove the background, and then apply a basic border.
Method 1: Adding a Simple Border
The easiest way to outline an image in Canva is by adding a basic border.
Step 1: Select the Image and Border
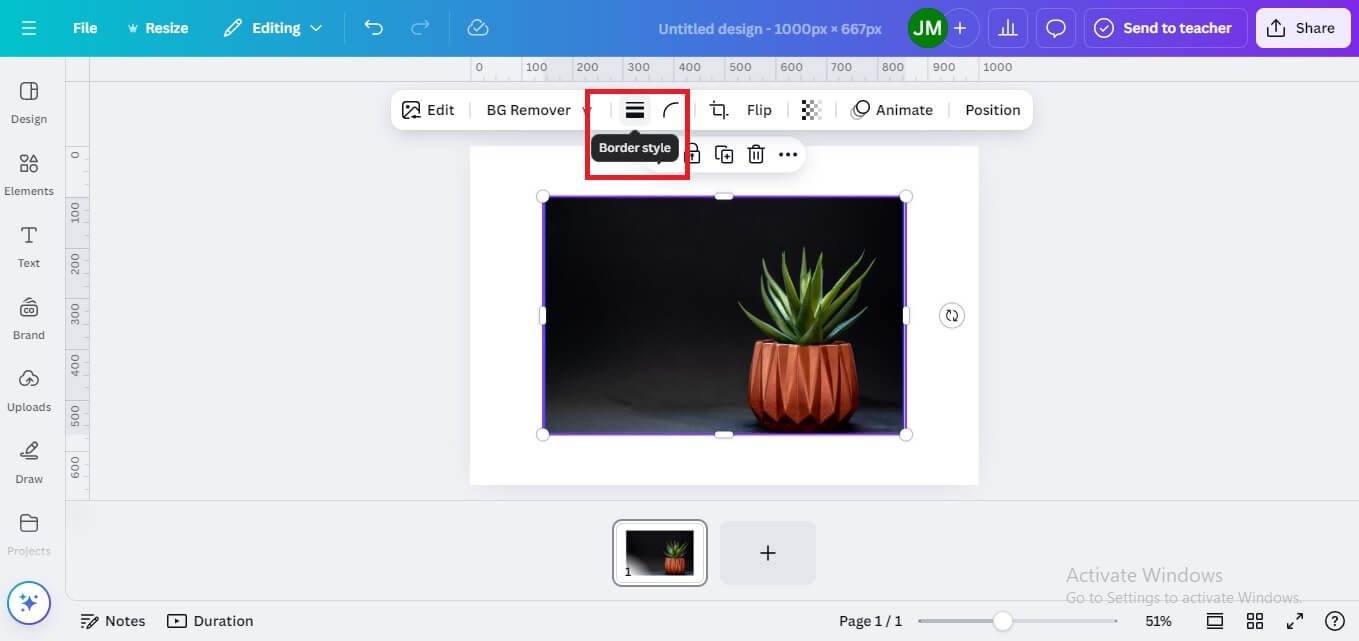
Open your Canva design and choose an image in Canva. Select the image, and click on the “Border style” option.
Step 2: Increase Border Width
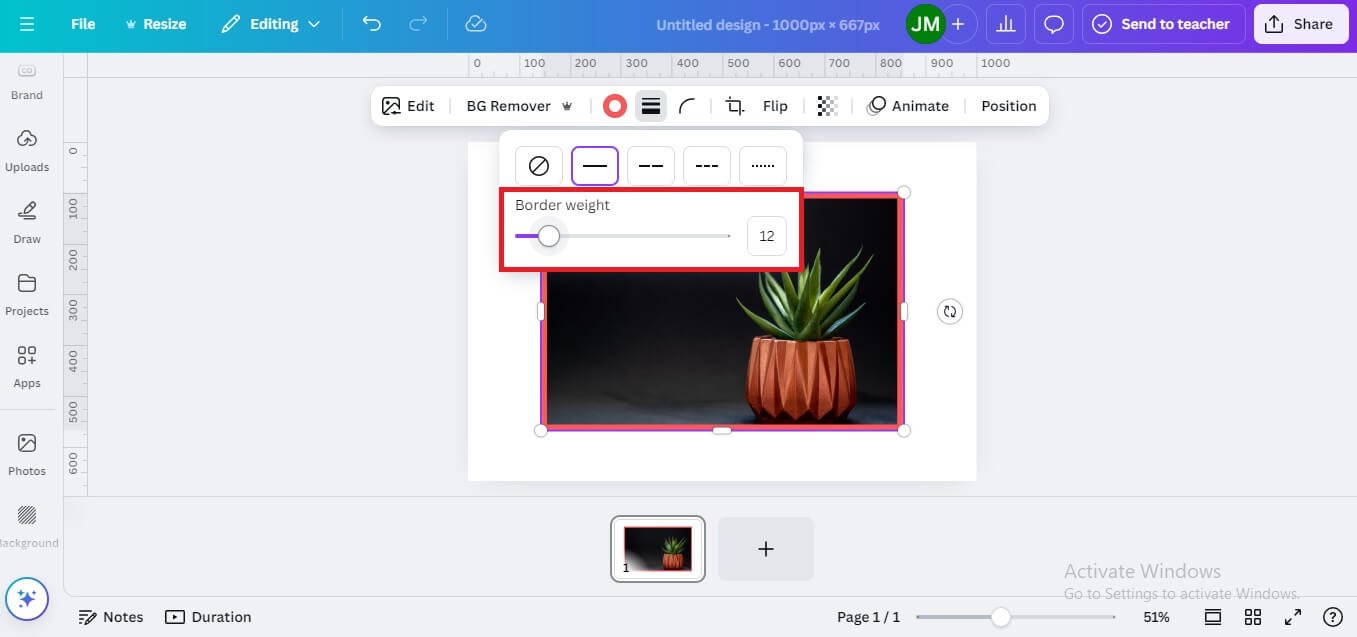
If the width is set to zero, no border is visible. Gradually increase the width to create a visible border.
Step 3: Change the Border Color
Customize the border color using the color picker.
This method is ideal for basic shapes like squares, rectangles, or circles.

Get the latest Canva tips as soon as I post them!
Tutorials, hacks, updates, tips, and everything in between.
Method 2: Using the CanBorder App
For more advanced border options, Canva’s CanBorder App allows you to create customized outlines.
Step 1: Access CanBorder
- Open the “Apps” section in Canva.
- Search for and select the CanBorder app.
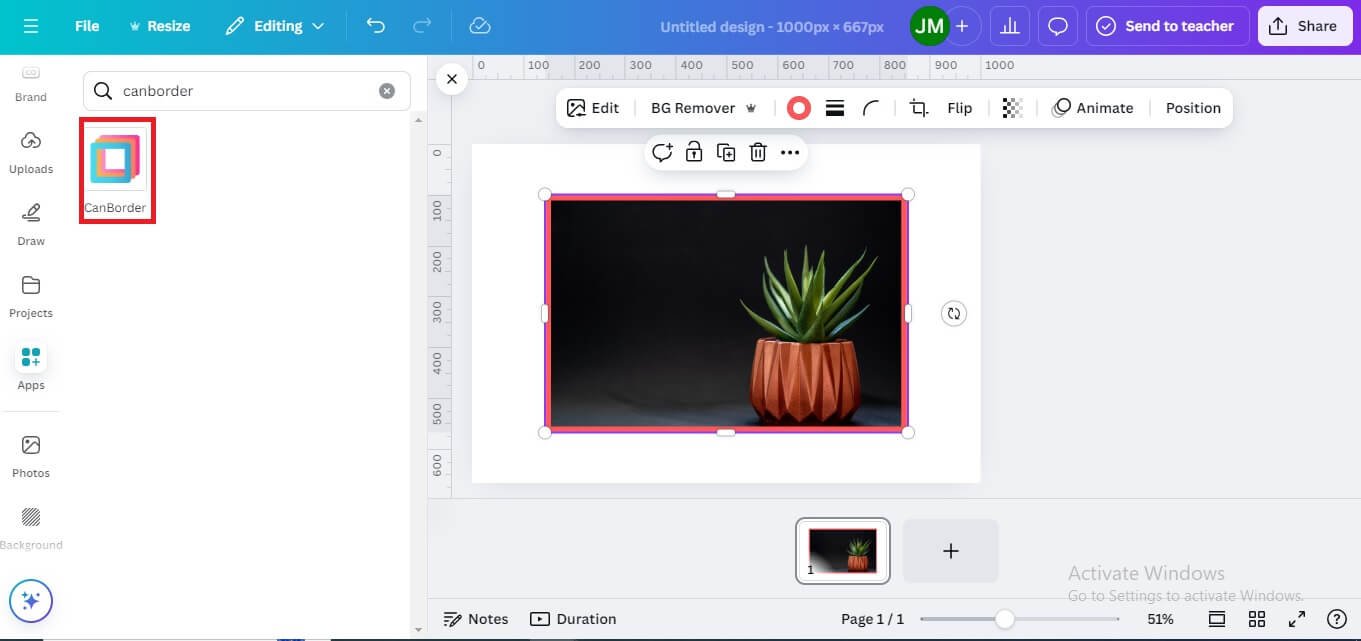
Step 2: Customize the Border
- Adjust the border thickness to increase or decrease the size of the border.
- Choose the border color you want.
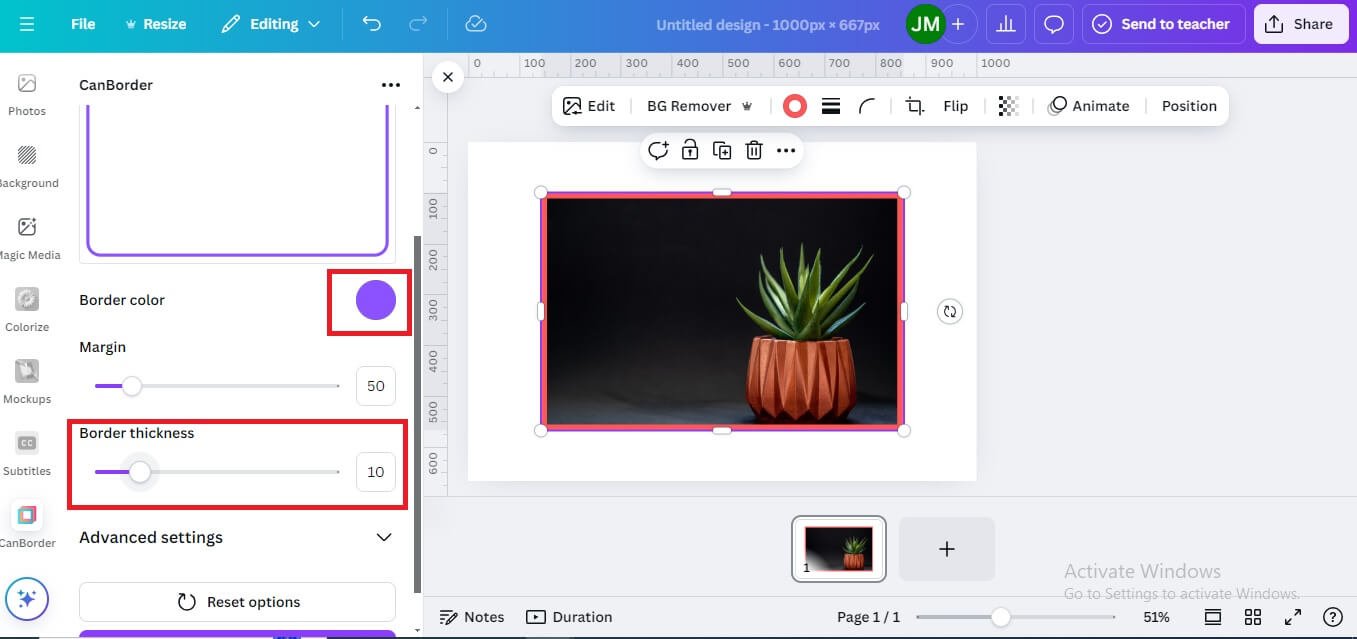
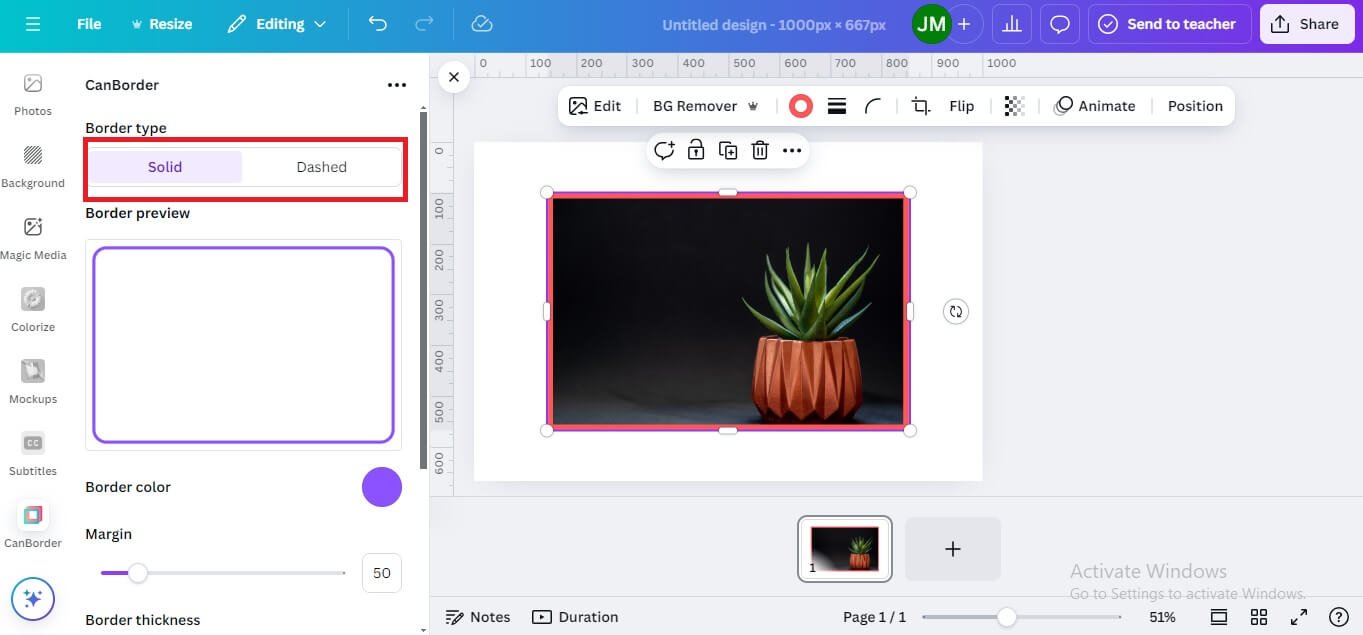
- There are 2 options available for the style of the border: Dashed and Solid. Choose the border type you prefer.
You can also use blurred borders. For blurred borders, increase the blur intensity you want. Go to Advanced settings, and increase the blur units.
Step 3: Apply the Border to Your Design
- Select the desired aspect ratio for the border (e.g., square, rectangle).
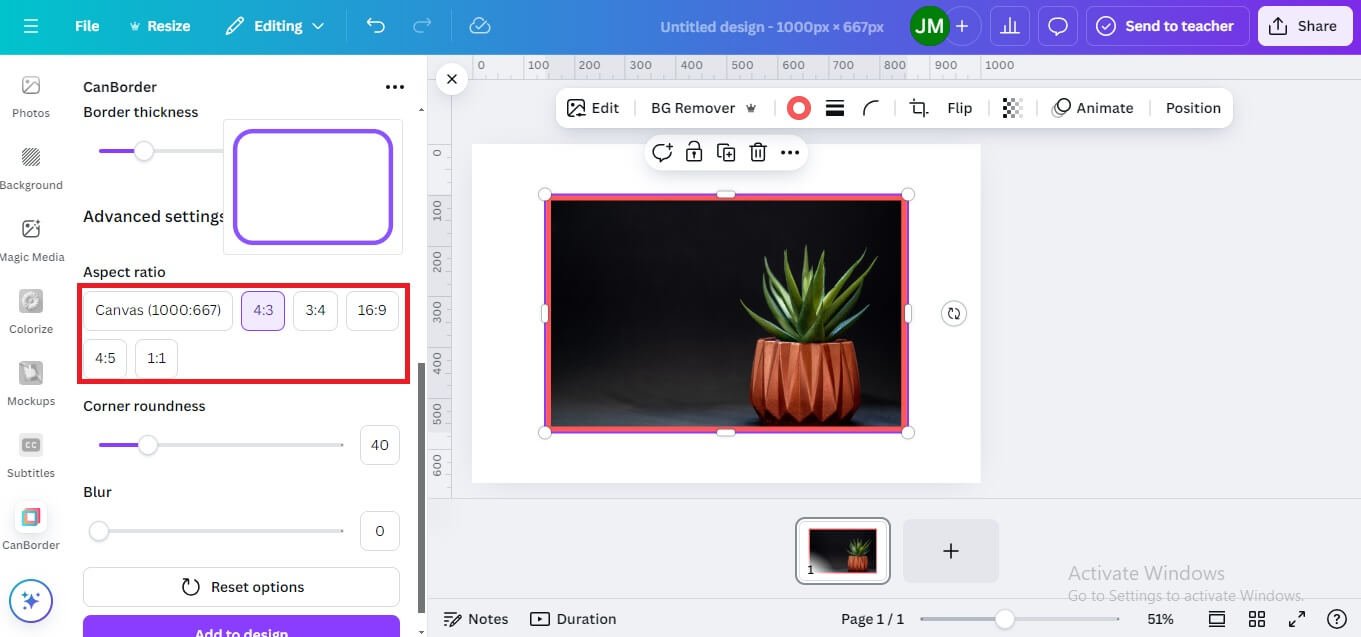
- Click on Add to Design to add the border to your image.
- Resize the Border
Manually adjust the border to fit your image.
Note: Ensure the border scales perfectly with your image to avoid misalignment.
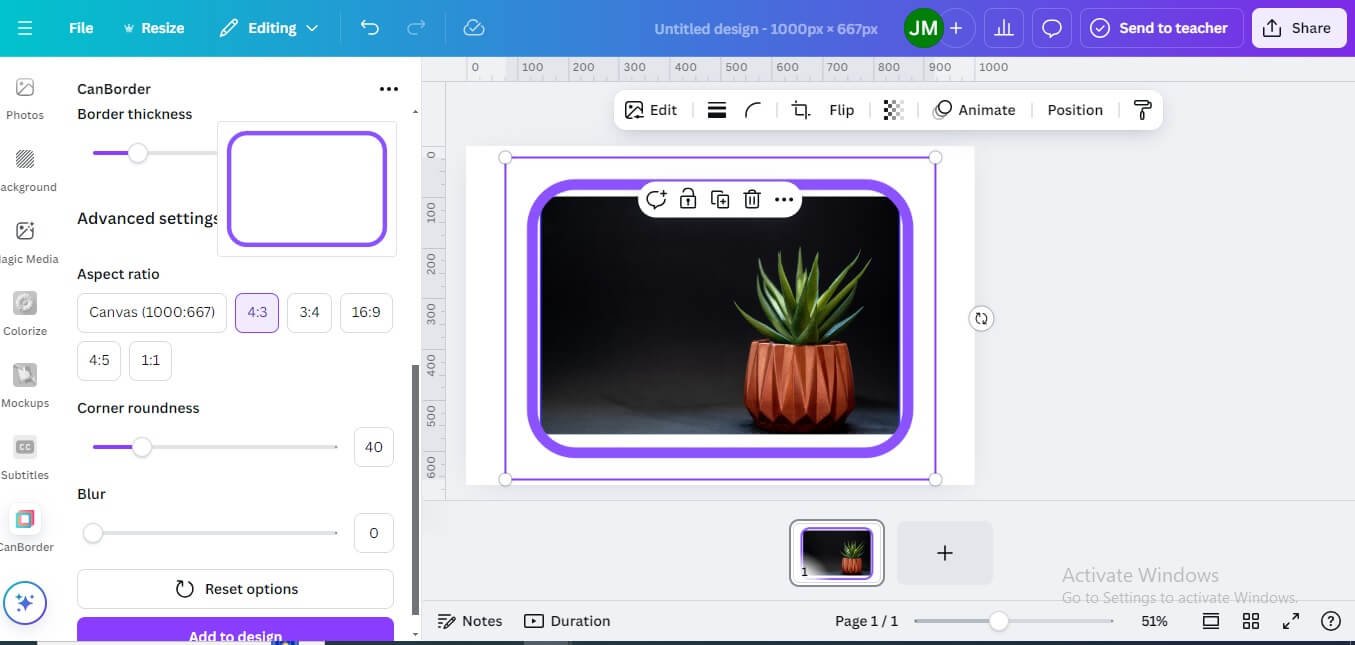
Pro tips:
- CanBorder offers creative options, but resizing and scaling can be tricky. Ensure the border fits your image perfectly.
- If your purpose is to set simple dashed borders, then it’s better to use a simple border as mentioned in method 1. Simply click on the Dash option while setting the weight from the border setting option. Keep in mind that you can’t blur the border using this method.
Method 3: Outlining a Cutout Image
If you only need a border around specific content within the image rather than the entire image, then follow this method outlining a cutout image method.
Step 1: Remove Background
- Select the image.
- Use the Background Remover tool (BG Remover) to eliminate the background (available only in Canva Pro).
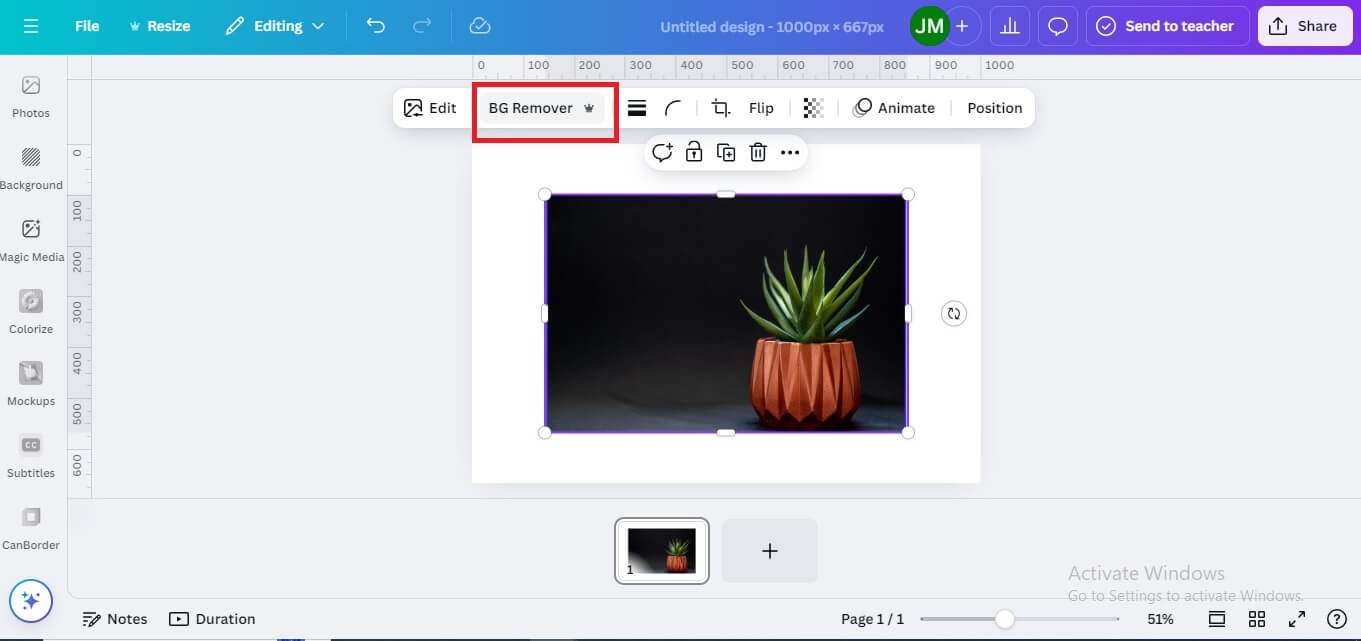
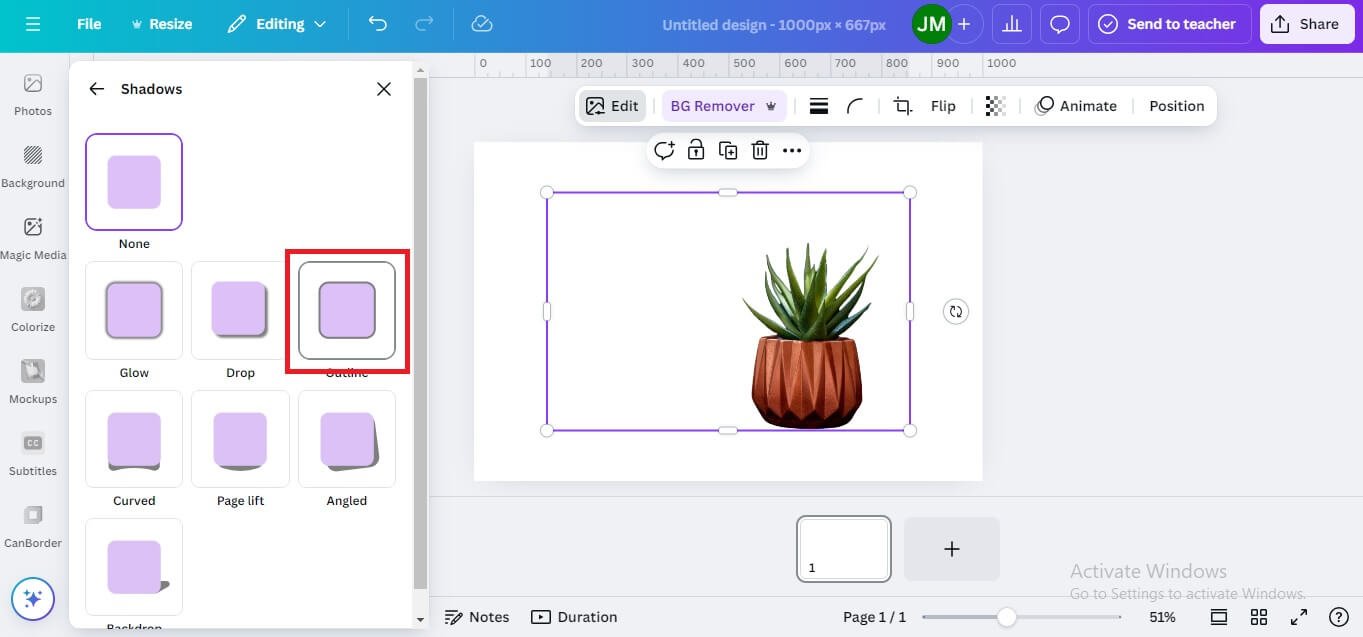
Step 2: Apply Outline Using Shadows
- Go to the “Shadows” section.
- Select Outline from the shadow options.
Step 3: Customize the Outline
- Adjust the Size to control the thickness of the outline.
- Change the Intensity and Color to match your design preferences.
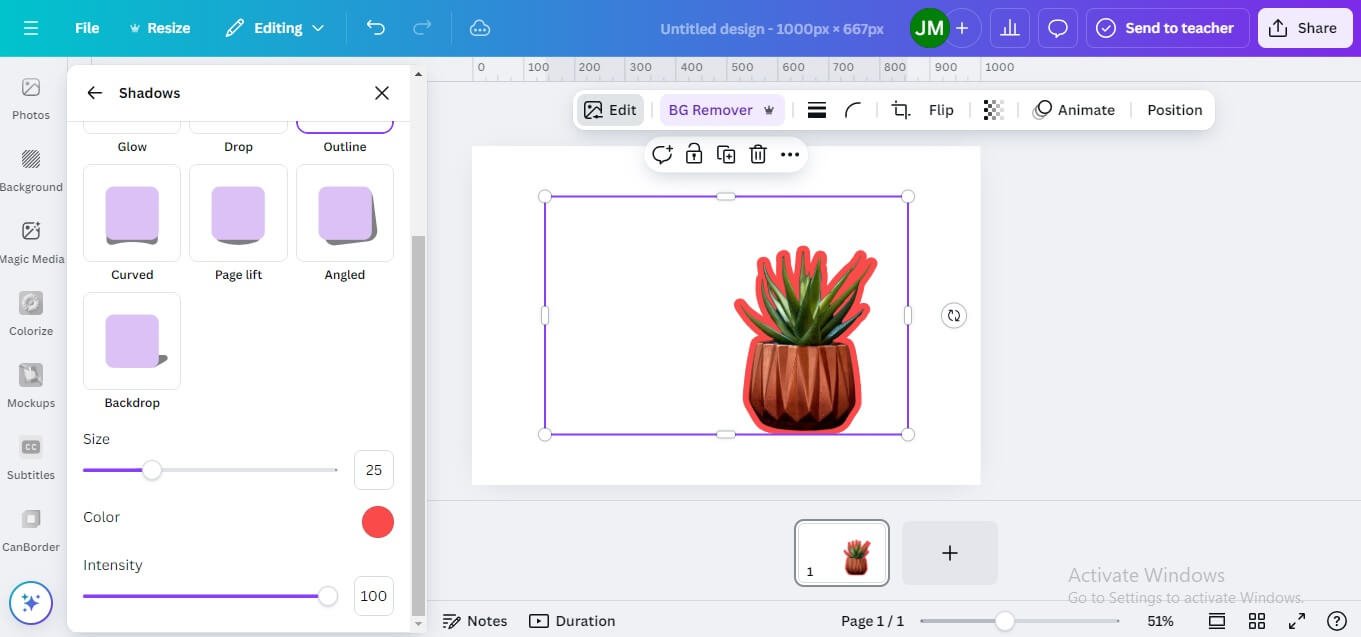
Step 4: Finalize the Design
- Confirm your settings and apply the changes.
This method is best for creating an outline around a specific object rather than the entire image.

30-Day Free Access
Try out all Canva PRO features
- 1-Click Background Remover
- Create Designs in Bulk
- 1-Click Design Resize
- 100M+ Stock Content
- 600K+ Templates
- Transparent background PNG files

30-Day Free Access
Try out all Canva Pro features
- 1-Click Background Remover
- Create Designs in Bulk
- 1-Click Design Resize
- 100M+ Stock Content
- 600K+ Templates
- Transparent background PNG files
Other Canva tutorials you may like:
Pages & Elements
- How to change page orientation in Canva
- How to change to landscape in Canva
- How to flip elements in Canva
- How to rotate in Canva
- How to select all in Canva
Fonts & Text
Visual Effects
- How to add a gradient in Canva
- How to add drop shadow in Canva
- How to invert colors in Canva
- How to slice in Canva
- How to pixelate a photo
- How to change the color of an image in Canva
- How to mask in Canva
- How to curve an image
- How to select all in Canva
Print & Business


