How to do Canva mail merge
Check out the video or read the steps below.
Canva’s Mail Merge tool lets you automatically fill in individual details in a design template.
It’s perfect when you need many items like certificates or invitations, each with personalized information such as names or addresses.
If you don’t have a Canva Pro subscription yet, get a 30-day free trial now, as you will need access to Canva Pro to do mail merge.
Step 1: Organize Your Data
You will need to have your data organized in a spreadsheet with clear column headers. For example, a list of names and courses would be in two separate columns labeled ‘Name’ and ‘Course’.
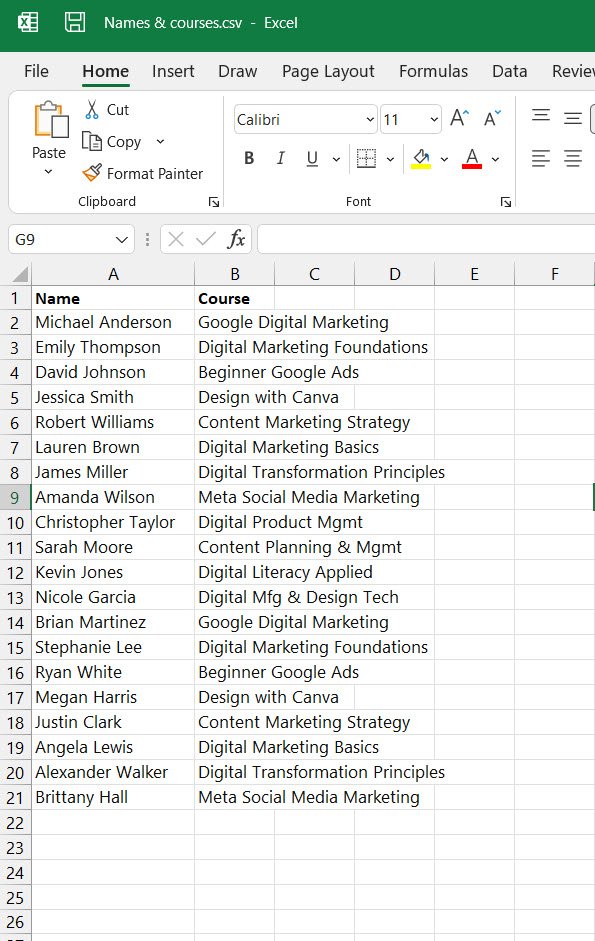
Step 2: Open Your Canva Template
Open the Canva template you want to use for your design.
In this case, it might be a ‘Certificate of Achievement’ template with text fields where you want to insert the name and course details.
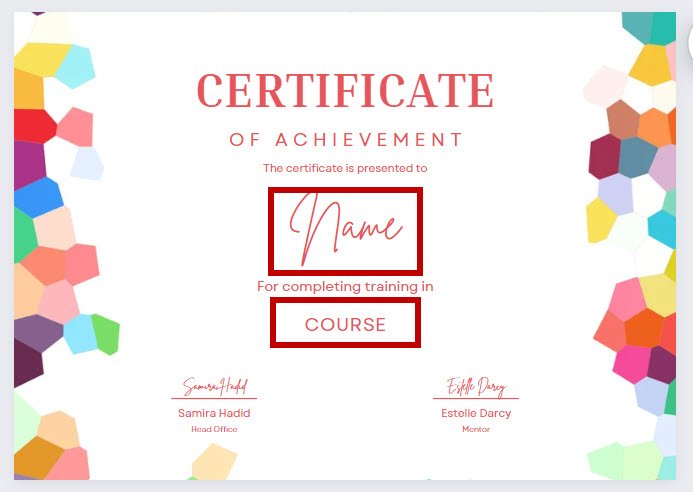
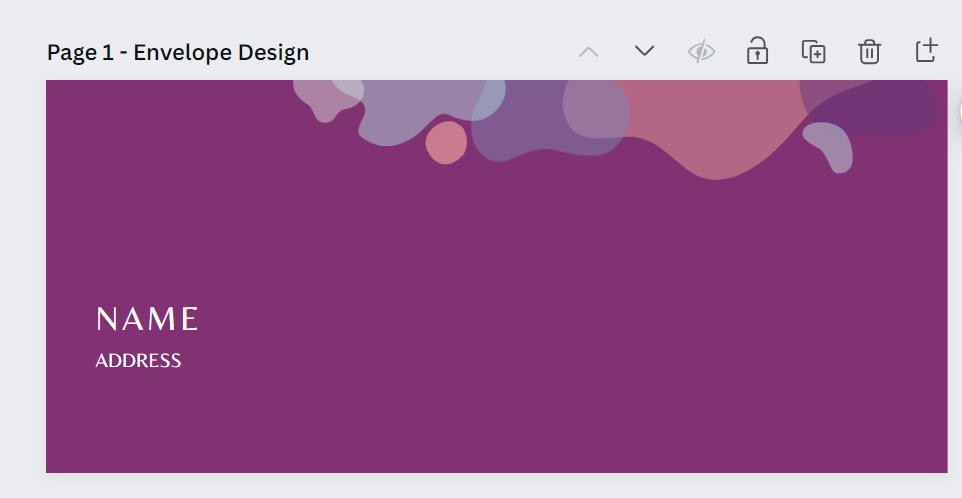
It could also be an envelope where you need to enter names and addresses.
Pro Tip:
The Canva Bulk Create app is available only in Canva Pro or Canva Teams. If you don’t have access to Canva Pro, get a 30-day free trial.
Related:
Step 3: Access Bulk Create in Canva
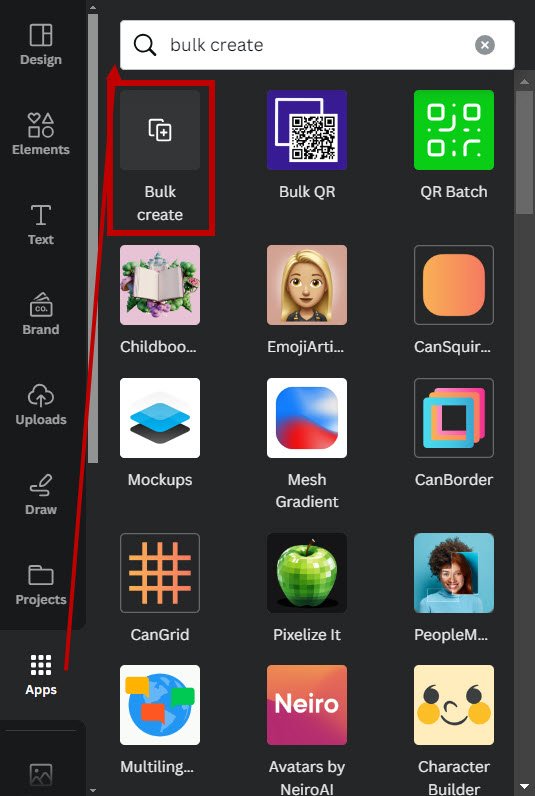
Within Canva, go to the ‘Apps’ section and search for “Bulk Create”.
Click on the Bulk Create app to start the process.

Get the latest Canva tips as soon as I post them!
Tutorials, hacks, updates, tips, and everything in between.
Step 4: Add Your Data
Once you have opened the Bulk Create app, you’ll be presented with two options:
“Enter data manually” and “Upload data”. You can either upload your CSV file directly or manually input the data into Canva.
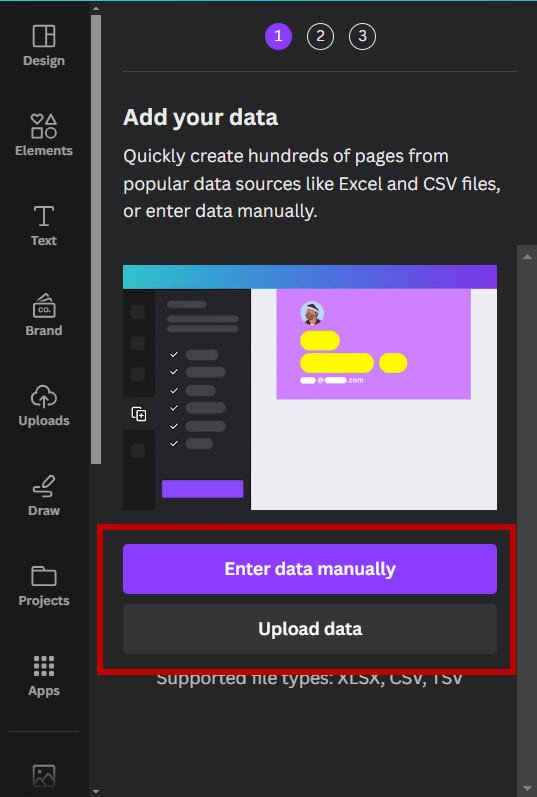
Upload Data via CSV File
If you choose to upload data:
- Click on ‘Upload data’.
- Select your CSV file, and it will be uploaded to Canva.
Manually Enter Data
If you choose to enter data manually:
1. Click on ‘Enter data manually’.
2. Clear the existing table.
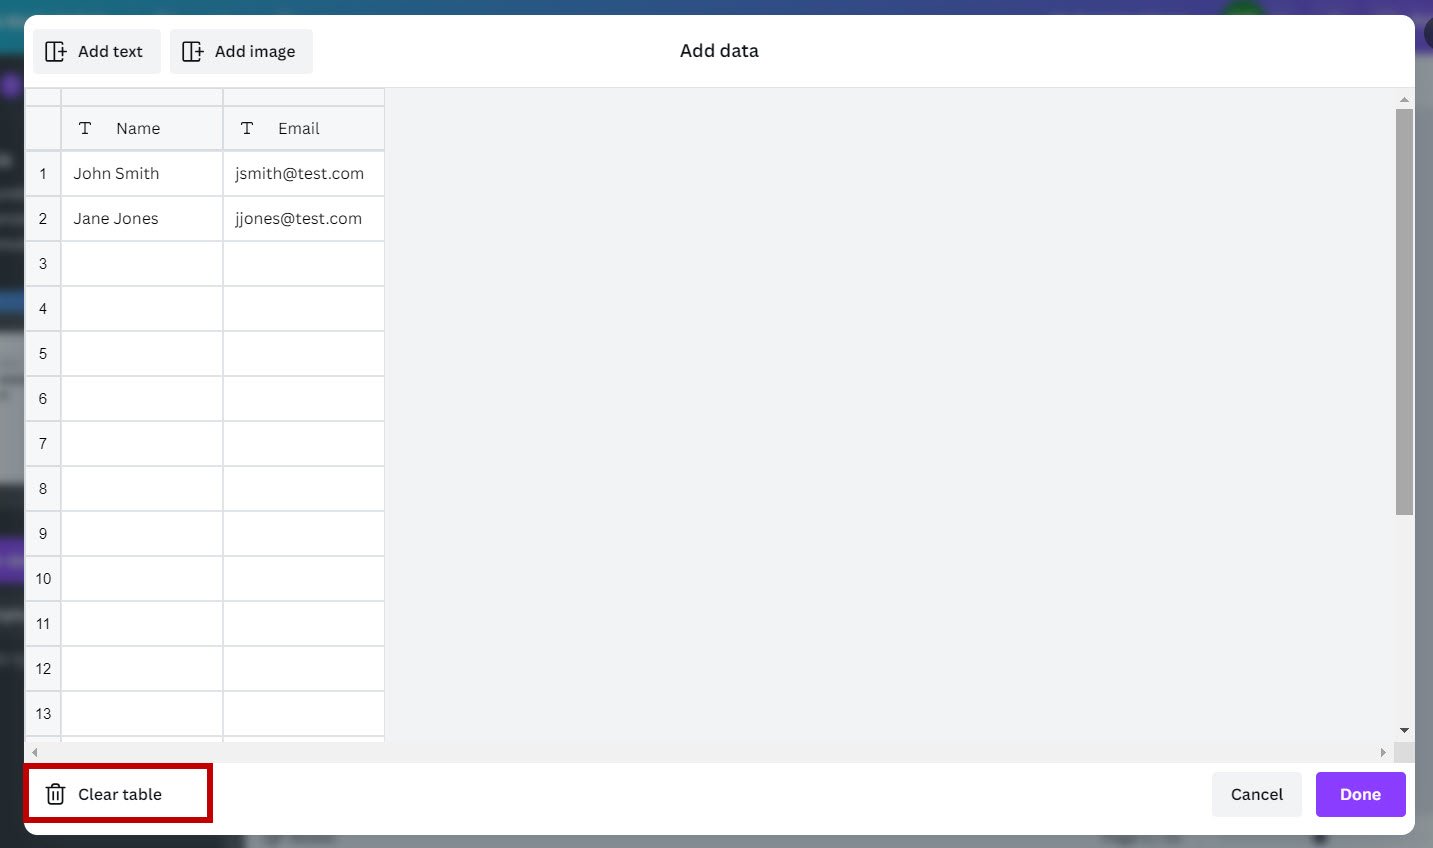
3. Input your data into the fields provided, ensuring it matches the template structure.
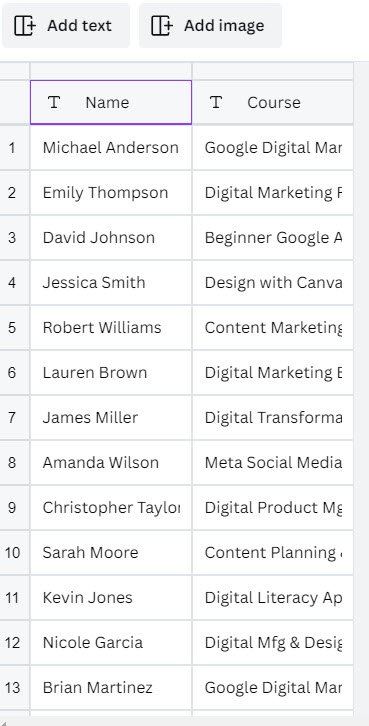
Whichever way you choose to upload your data, the end result will be the same.
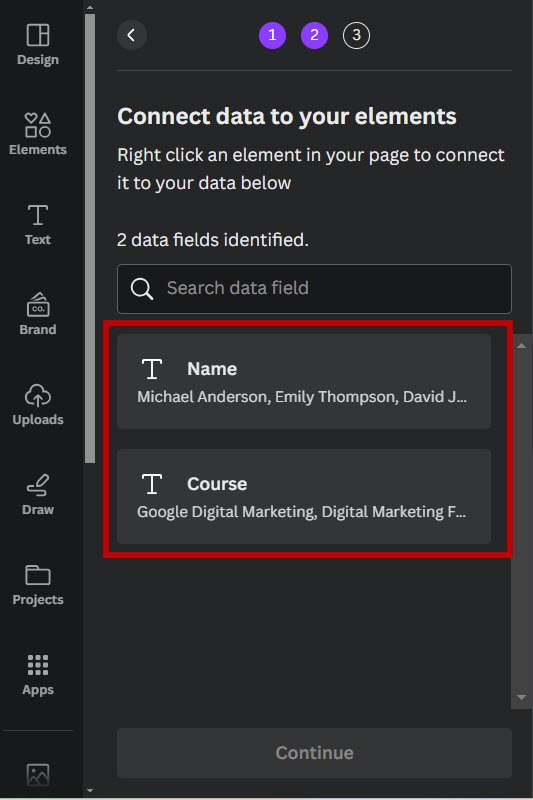
You will have your data uploaded in Canva. In this case, I added only a csv with 2 columns: Name & Courses, so that’s what I see here.
Step 7: Connect Your Data to Design Elements
After uploading or manually entering your data in Canva, you have to connect your design element with the data you uploaded.
So, for example, where there is a ‘Name’ in the design, you want to add the name from your data. If 20 names are uploaded, you will get 20 design pages on Canva.
Similarly, for courses.
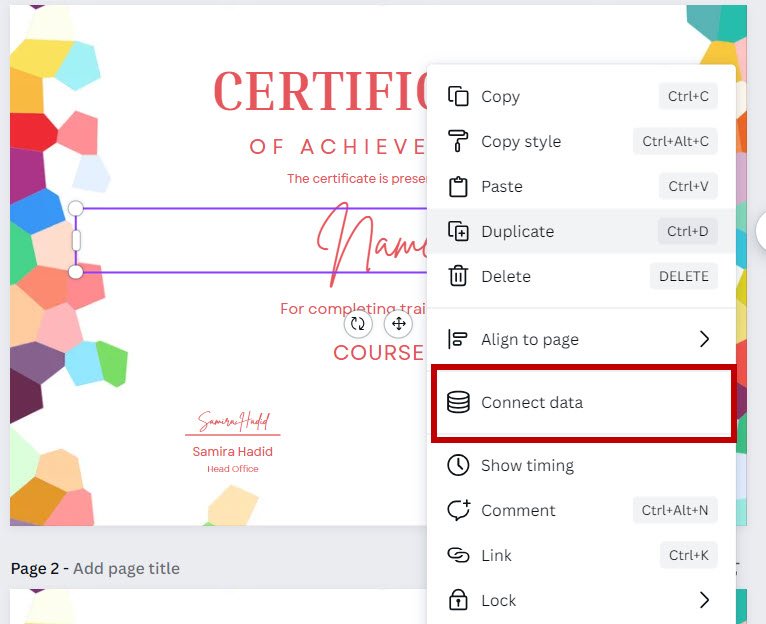
Right-click on the text element of your Canva template where you want to insert the name, and a context menu will appear. Choose “Connect data”.
You’ll then see your data categories, such as ‘Name’ and ‘Course’, listed.
Connect the Name name design element to the Name data column .
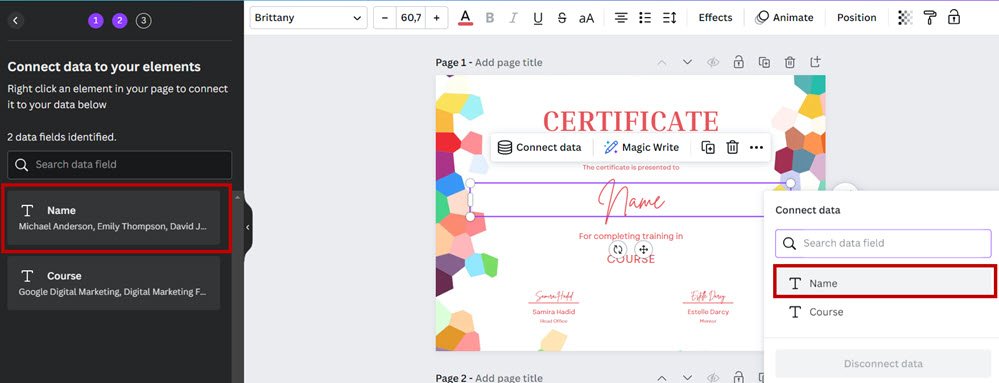
Similarly, right click on the Course design element and choose to connect it to the Course data column.
Step 8: Apply and Generate Designs
After connecting your data, Canva will show how each certificate will look with the data applied.
If everything looks correct, click on “Generate designs”
Pro Tip:By default ‘Select all’ will be ticked, which means that Canva will create a design page for each row in your data.
If you want to exclude any of the rows, just unselect it from this list.
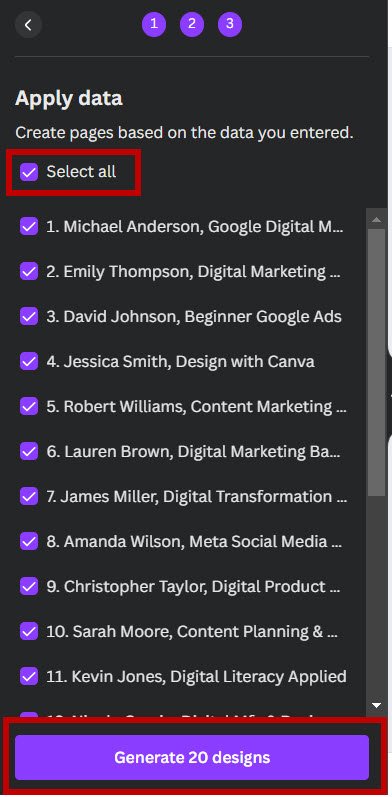
Canva will generate a separate design for each row of data that you have selected.
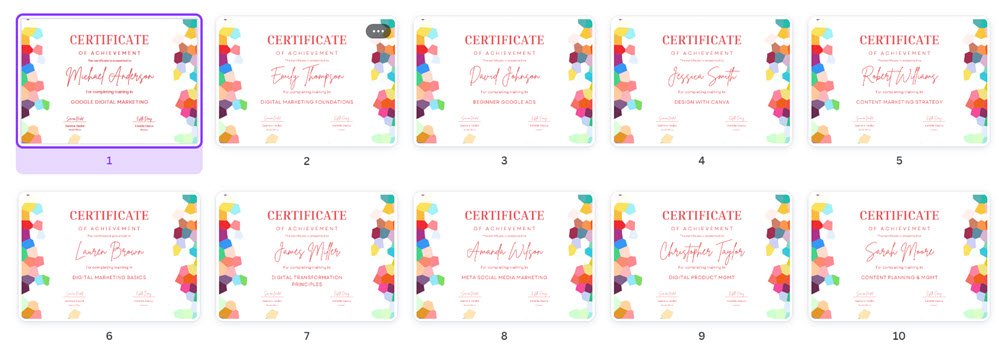
Step 9: Review and Download
Once the designs are generated, review each page to make sure all the information is correctly placed and formatted. If some data is not properly displayed, adjust it manually.
You can then download or print your customized designs directly from Canva. Also check out my tutorial on how to add print bleed and crop marks in Canva.

30-Day Free Access
Try out all Canva PRO features
- 1-Click Background Remover
- Create Designs in Bulk
- 1-Click Design Resize
- 100M+ Stock Content
- 600K+ Templates
- Transparent background PNG files

30-Day Free Access
Try out all Canva Pro features
- 1-Click Background Remover
- Create Designs in Bulk
- 1-Click Design Resize
- 100M+ Stock Content
- 600K+ Templates
- Transparent background PNG files
Other Canva tutorials you may like:
Pages & Elements
- How to change page orientation in Canva
- How to change to landscape in Canva
- How to flip elements in Canva
- How to rotate in Canva
- How to select all in Canva
Fonts & Text
Visual Effects
- How to add a gradient in Canva
- How to add drop shadow in Canva
- How to invert colors in Canva
- How to slice in Canva
- How to pixelate a photo
- How to change the color of an image in Canva
- How to mask in Canva
- How to curve an image
- How to select all in Canva
- How to Add an Outline to an Image in Canva: 3 Ways
- How to Cut Out an Image in Canva: 3 Ways
- How to Mask in Canva: Create a Clipping Mask Effect
Print & Business


