How to Change Margins in Canva
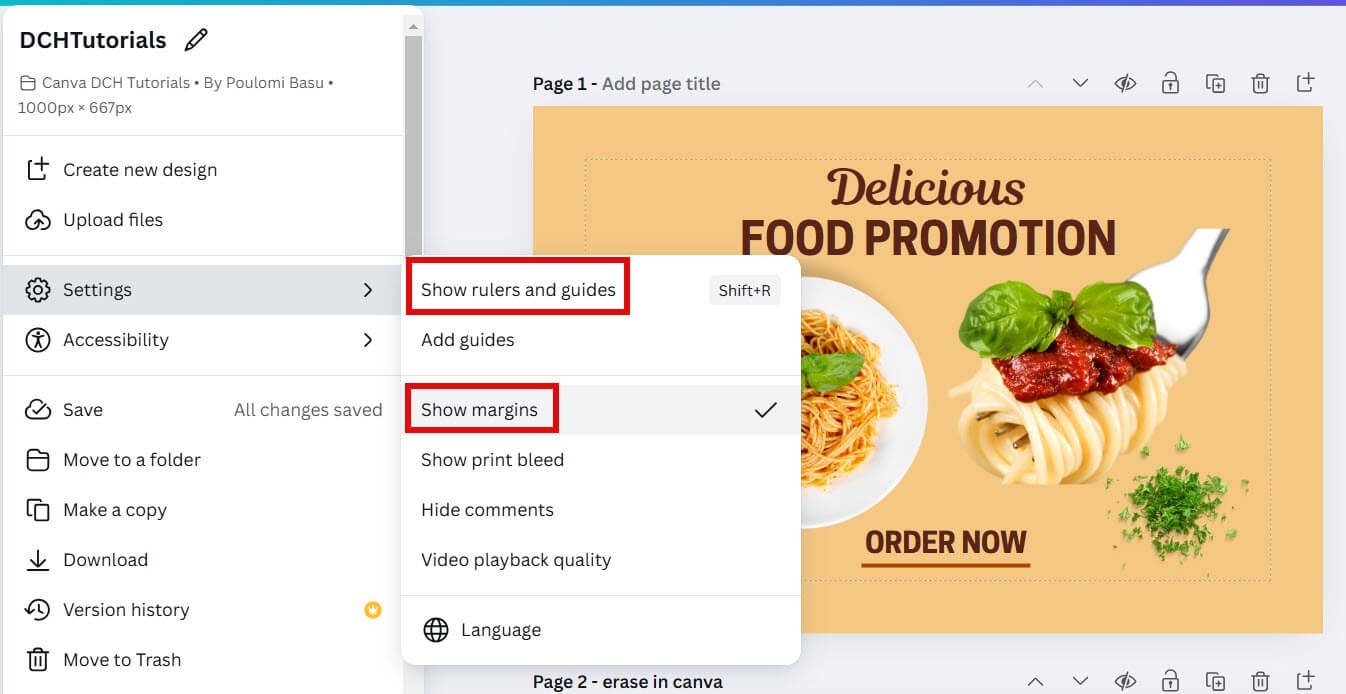
Go to File > Show Margins to display the default margins. Go to File > Show Rulers and Guides to display the guides. Adjust the guides on the margin lines to keep your text within the margin area.
Step 1: Open the Margin and Guide options
- Access the File menu: Start by clicking on the File option in the top menu of Canva.
- Show Margins: In the dropdown, select Show Margins.
- You’ll notice a faint gray line appears around the edges of your design canvas. This gray line represents the default Canva margin, which serves as a boundary to help keep your content within a safe area.
Step 2: Add Rulers and Guides
- Enable Rulers and Guides
Go back to the File menu, then click on Show Rulers and Guides. This will display rulers on the top and left sides of your design area. - Drag in a Guide
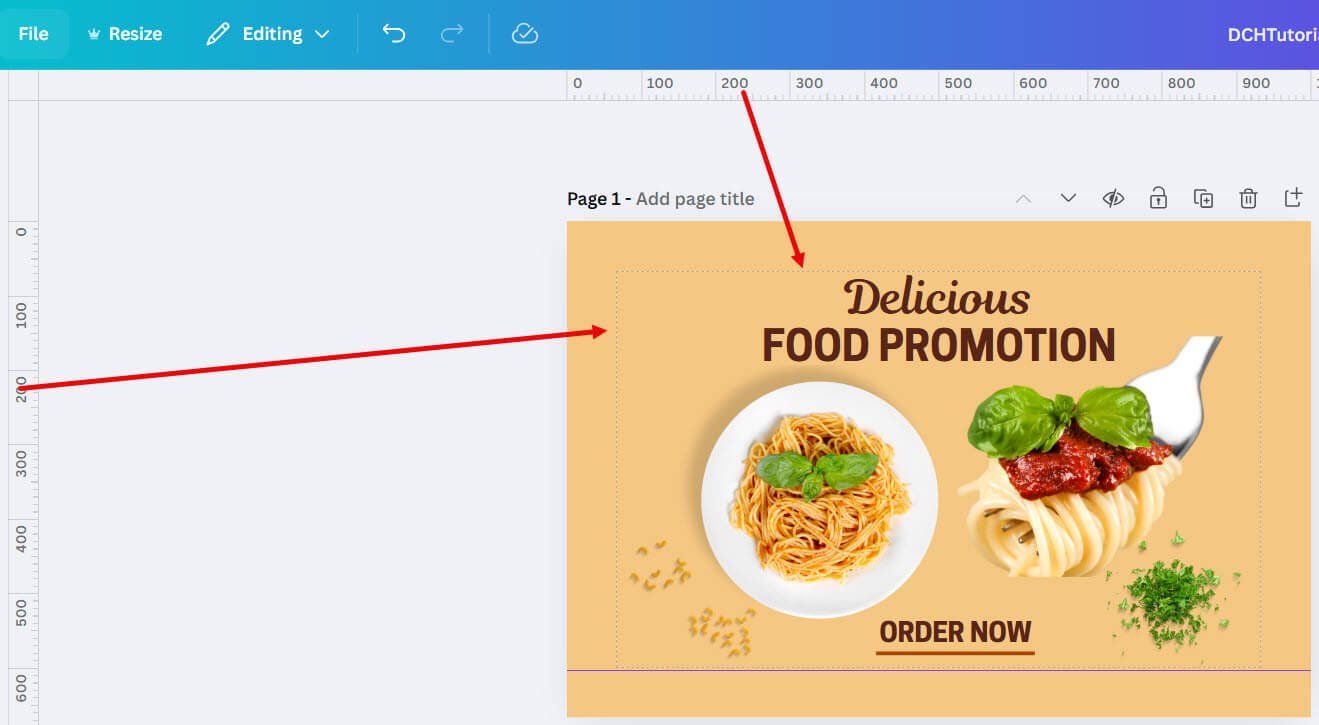
Click on the ruler, then drag a guide onto your canvas. The guide will appear as a purple line, which you can position anywhere on the design.
Step 3: Align Guides with Margins
Place guides along the gray margins
To create a visual boundary, drag guides to align with the gray margin line. This can help you easily see the margin area and avoid placing important content outside of it.


Get the latest Canva tips as soon as I post them!
Tutorials, hacks, updates, tips, and everything in between.
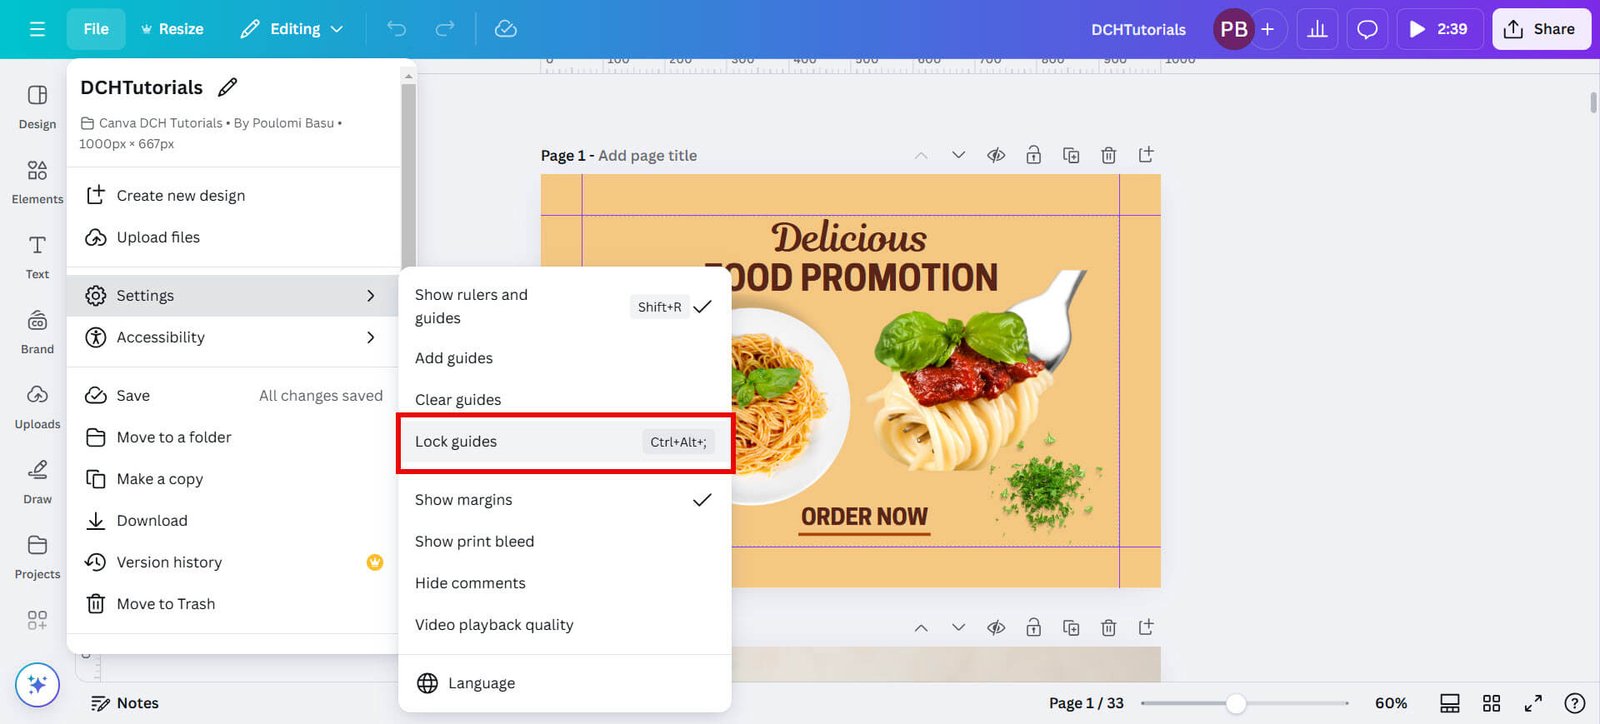
Step 4: Lock Guides to prevent accidental movement
To keep the guides from moving while adjusting other elements, go back to the File menu and select Lock Guides. This feature prevents accidental shifting of the guides, making it easier to adjust design elements within the margins.
Step 5: Adjust elements within the guides
- Move elements within margins
Select any text or image that might be outside the guides and drag it inward until it fits within the guides. This helps ensure that your content stays safely within the visible area of your design, preventing any cut-offs during printing or downloading. - Double-check alignment
Review your design to make sure all elements are correctly aligned within the guides. Adjust as necessary to ensure nothing essential goes beyond the margin.
If you print from Canva, you can also add bleed and crop marks to keep your design within the margins.

30-Day Free Access
Try out all Canva PRO features
- 1-Click Background Remover
- Create Designs in Bulk
- 1-Click Design Resize
- 100M+ Stock Content
- 600K+ Templates
- Transparent background PNG files

30-Day Free Access
Try out all Canva Pro features
- 1-Click Background Remover
- Create Designs in Bulk
- 1-Click Design Resize
- 100M+ Stock Content
- 600K+ Templates
- Transparent background PNG files
Other Canva tutorials you may like:
Pages & Elements
- How to change page orientation in Canva
- How to change to landscape in Canva
- How to flip elements in Canva
- How to rotate in Canva
- How to select all in Canva
Fonts & Text
Visual Effects
- How to add a gradient in Canva
- How to add drop shadow in Canva
- How to invert colors in Canva
- How to slice in Canva
- How to pixelate a photo
- How to change the color of an image in Canva
- How to mask in Canva
- How to curve an image
- How to select all in Canva
Print & Business


