How to Set Snagit As Default Screen Capture Tool
First, disable the Windows default Print Screen functionality in the ‘Keyboard’ settings under ‘Accessibility Keyword Settings.’ Then, click under the Snagit Capture button and press the Print Screen key. This will make it the default hotkey for screen capture.
Here is a video and a step-by-step guide.
First things first, if you don’t already have Snagit installed, you’ll need to get it on your computer.
Snagit offers a 15-day free trial, which is perfect for testing out its capabilities before making a purchase.
1. Disable the Default Windows Hotkey
Go to your Windows menu bar, and type Accessibility Keyword Settings. Open it.
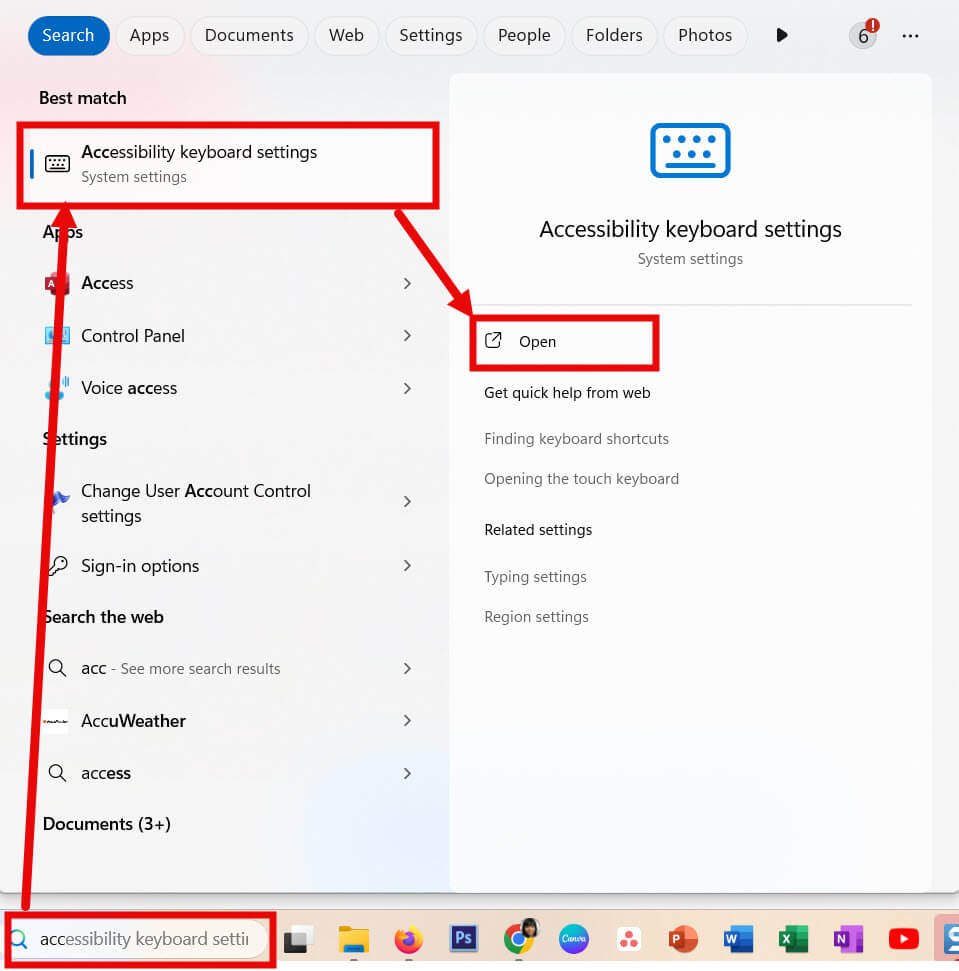
Find the option that says ‘Use the Print Screen key to open screen capture’ and turn it off.
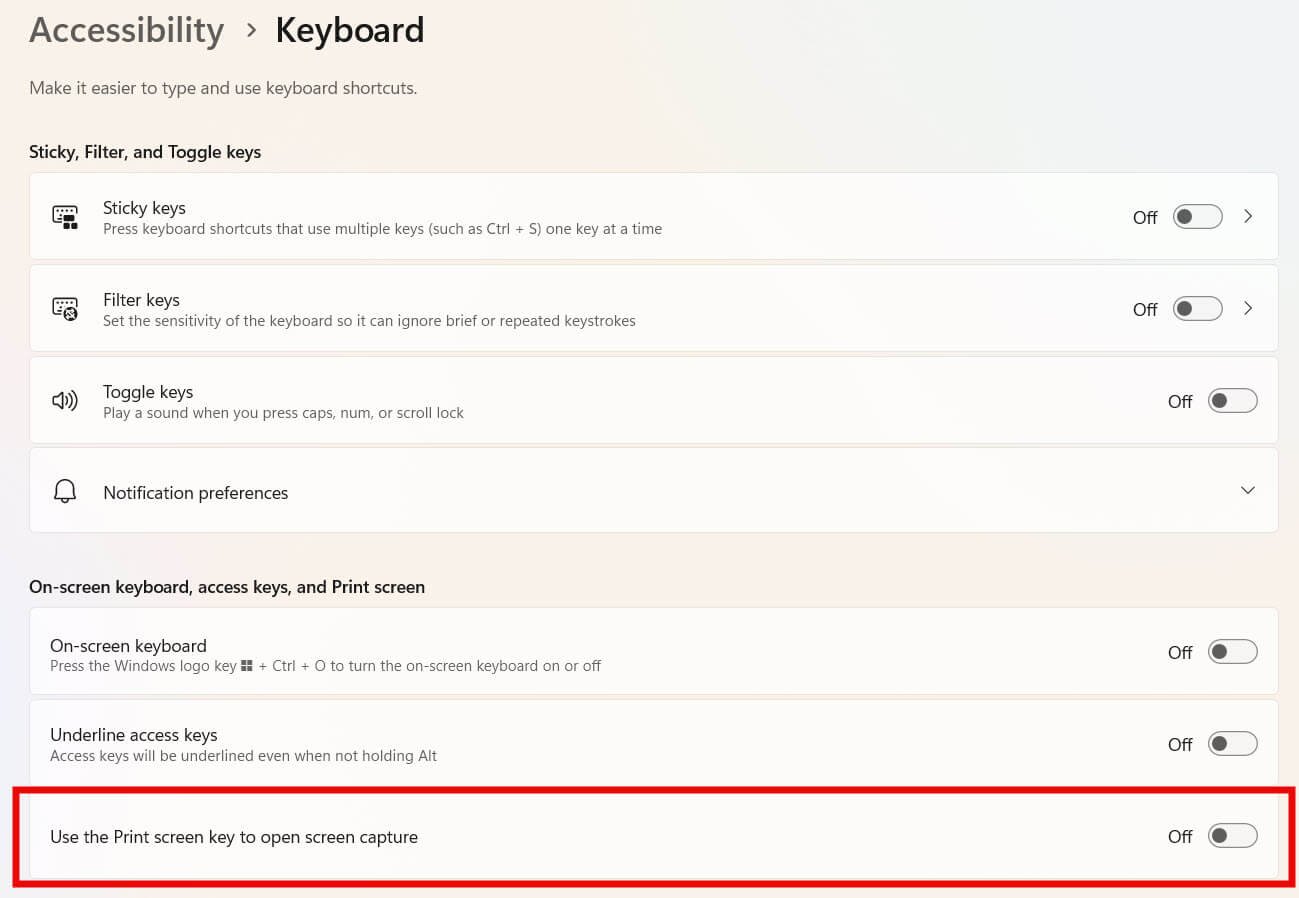
This step prevents Windows from using the Print Screen key for its built-in screen capture tool.
2. Assign Snagit as the Default Screen Capture Tool
Return to Snagit and click below the red capture button to assign a hotkey.
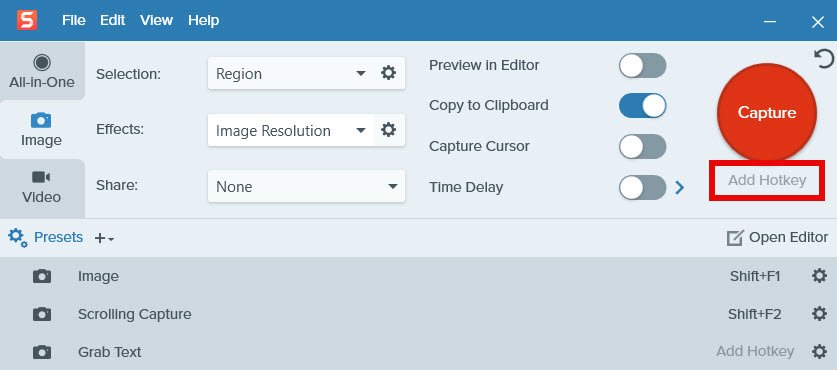
With the curson below the button, press the Print Screen key on your keyboard.
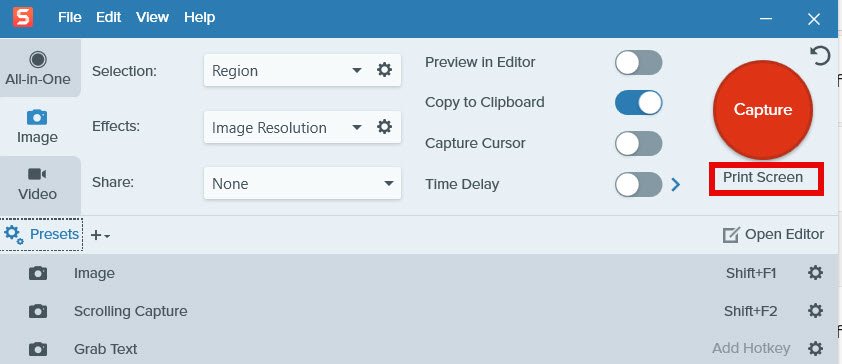
Do a test run by pressing the Print Screen key to see if Snagit activates as expected.
3. Customize Your Capture Settings
Snagit offers various capture settings, including image, video, and panoramic scrolling captures.
Customize these options to suit your typical usage. You can set up profiles for different types of captures you do regularly, making it even faster to get the right screenshot or video.
And that’s it!
You have set Snagit as your default screen capture tool.
I prefer having Snagit as the default print screen tool so I can access it quickly and easily, without opening the Snagit record window.
How do you prefer to do screen capture, and with which keys?
Snagit is great for creating professional documentation, tutorials, or just capturing important moments.
Here are more posts you may like on image editing:


