How to turn a screenshot into a PDF
To convert screenshots to PDF, use Snagit by selecting your screenshot, going to File > Export, and choosing PDF as the file format.
For converting multiple screenshots into a single PDF, select them all together in Library, then right-click and print to PDF.
If you want to know how to convert screenshots to PDF without losing quality, this post is for you.
I will guide you on how to do that with Snagit, my favorite screen capture tool.
We will cover 3 scenarios:
- Convert a single screenshot to PDF
- Convert multiple screenshots to individual PDFs
- Combine multiple screenshots into a single PDF
Before we start, you’ll need to have Snagit installed on your computer.
Trust me, if you need to use screenshots for work or tutorials, you won’t regret getting Snagit!
Before getting started, you need to have two things ready:
1. Get Snagit
If you don’t have Snagit yet, you have to download it first.
2. Take your screenshot(s)
Open Snagit, and use the capture tool to take a screenshot or multiple screenshots. You can capture anything from a small dialog box to a large, scrolling webpage.
Now it’s time to convert your Snagit screenshot to a PDF! See the video below.
1. How to Convert a Single Screenshot to PDF
1. Select the Screenshot: Open the Snagit Editor and select the screenshot you want to convert.
2. Export the Image: Go to File -> Export
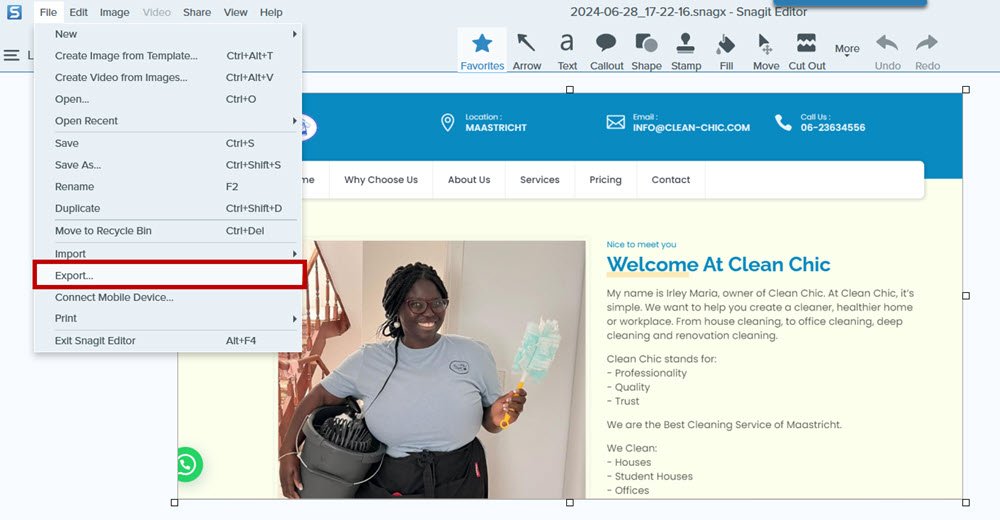
3. Choose PDF Format: In the export window, change the file format from the default JPEG to PDF. This option is under the ‘File type’ dropdown menu.
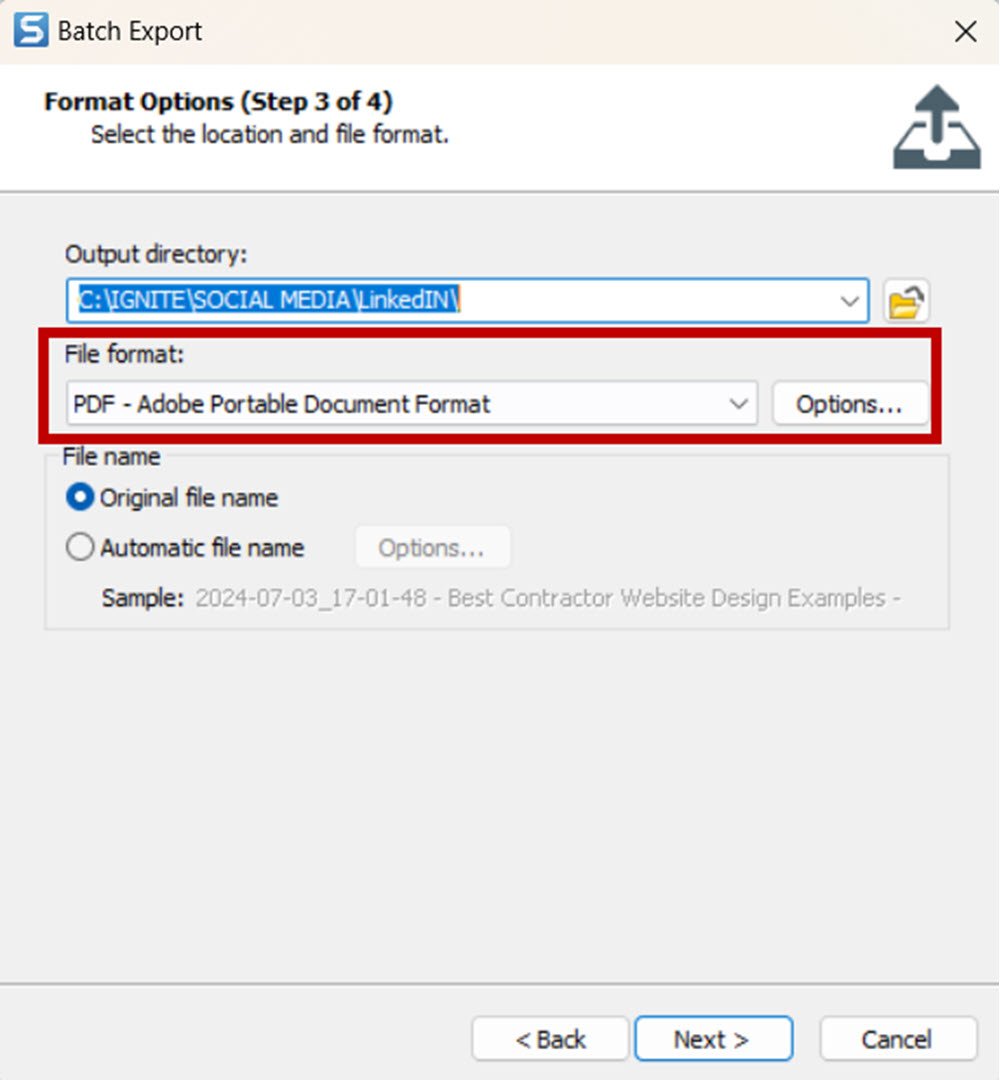
4. Save the File: Choose your output directory where you want the PDF to be saved, then click ‘Save’.
Your screenshot is now saved as a PDF file in your specified location.
2. How to Convert Multiple Screenshots to Individual PDFs
If you have multiple screenshots to convert:
1. Select Multiple Images
Hold down the Ctrl or Shift key and click to select all the screenshot you want to convert.
2. Export to PDF: Follow the process above of File -> Export.
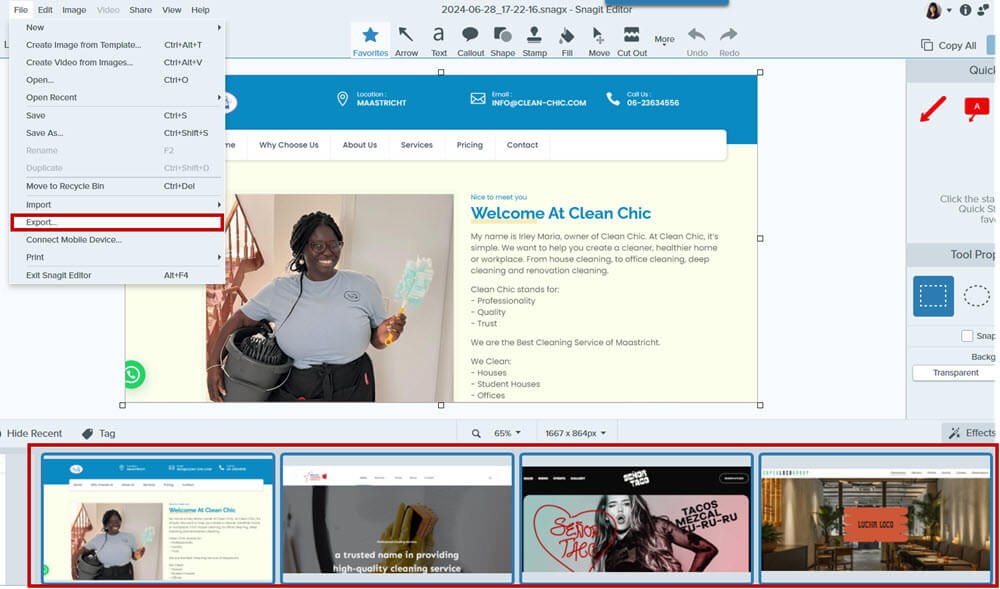
Each screenshot will be saved as a PDF file.
3. How to Convert Multiple Screenshots into a Single PDF
This one is not so straightforward, but it’s also super easy.
1. Select Images
Instead of going to the default editor view, go to the Snagit Library.
In the Snagit library, select all the screenshots you want to combine.
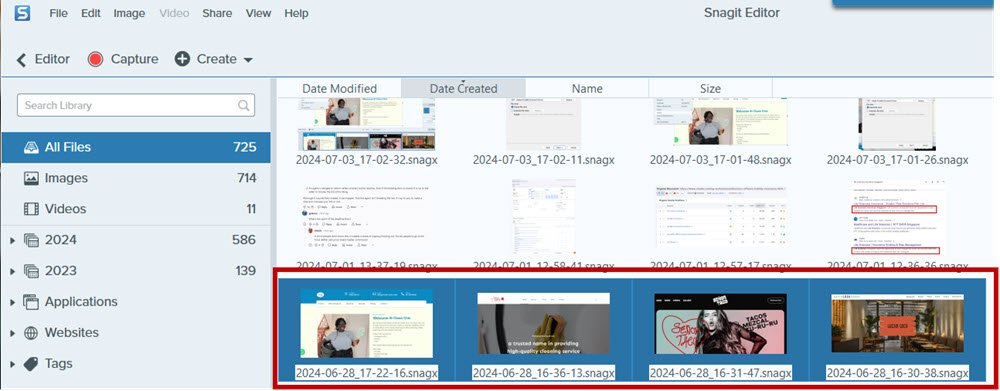
2. Access the Print Options
Right-click and select Print -> Print Multiple Images.
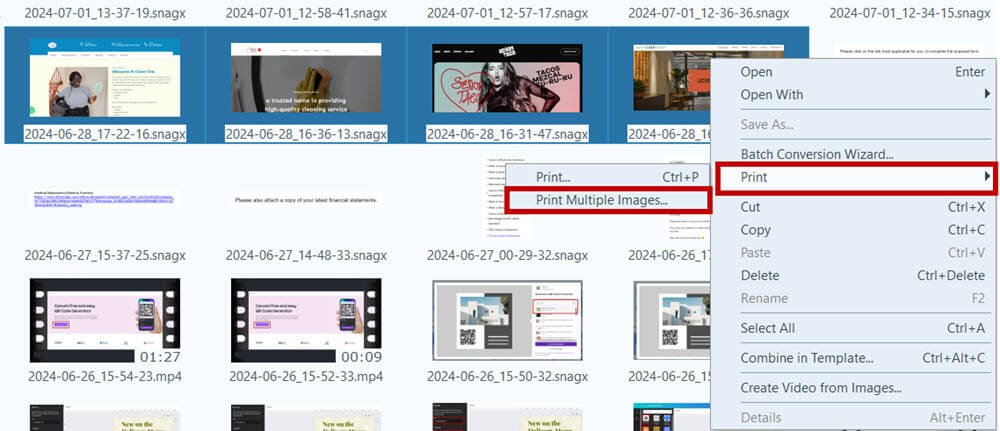
You can choose ‘Microsoft Print to PDF’ as the printer, or even Adobe PDF if you have it installed. Doesn’t make too much of a difference.
3. Choose your Orientation
Click on Properties.
Choose whether you want your screenshots in a portrait or horizontal format.
4. Customize your PDF Layout
Choose how you want your images organized in the PDF.
Click on Multiple Images Layout.
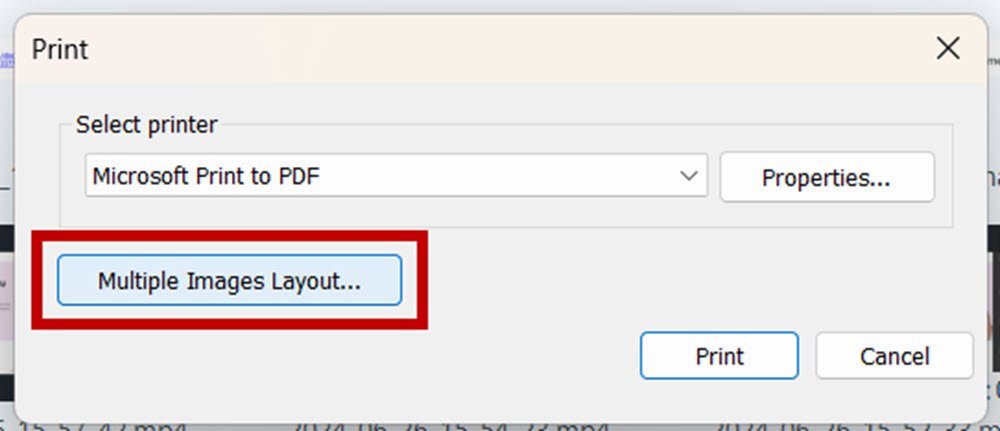
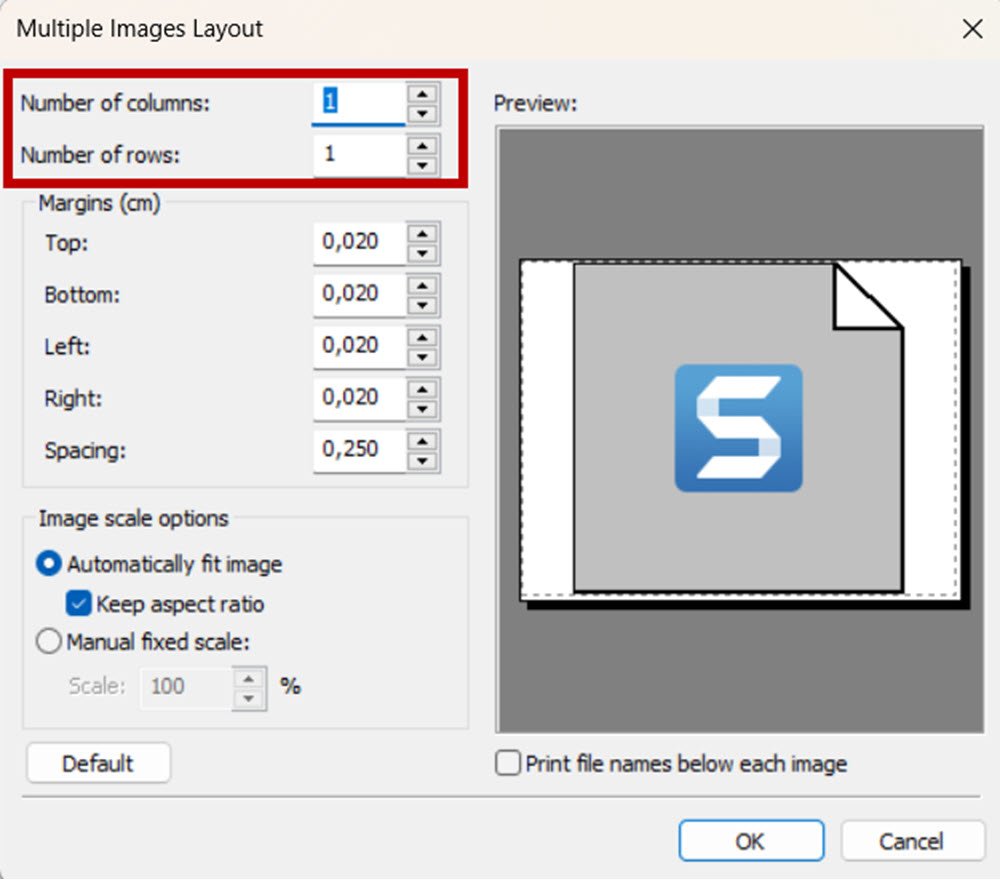
You can choose the number of screenshots per page.
You can also choose the number of rows and columns to organize your screenshots.
5. Print to PDF
When you are happy with your layout, click OK -> Print.
Choose a location to save your PDF.
Conclusion
I occasionally use the snipping tool, but mostly I use Snagit for all screenshot work. Besides, using Snagit to save your screenshots as PDFs is an effective way to maintain the quality of your images.
It provides more control over the output, ensuring that your screen captures look professional and clean.
Snagit offers a free trial for 15 days, so download it and try it out now!
You might also like to read:


